

How To Repair Stove Top Enamel
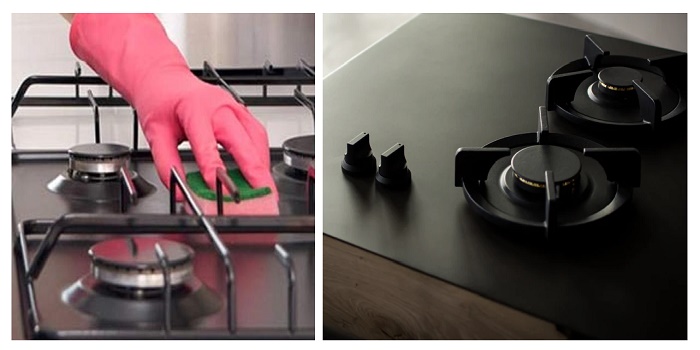
The enamel that covers your stovetop is a blazon of porcelain that is tough, durable, and designed to repel stains and scratches.
It's as well an insulator so you can impact most of the stove with your blank easily even when in operation.
And while it is quite tough and durable, information technology can all the same be scratched or chipped which means that repairs are needed.
What follows is a few simple steps where you lot can repair your stovetop from the minor dents, dings, and scratches.
This will relieve you a considerable amount compared to having the stovetop replaced or purchasing a new stove.
What'south Here in the Article:
How to Repair the Enamel of Your Erstwhile Stove Top?
Let'south get started with the very first step which is…
Sanding & Wiping…
Obtain some 400-grit sandpaper and sand forth with the damaged areas.
You lot'll want to smoothen down any rough edges along the length of the damaged stovetop.
Once you have sanded the area thoroughly, wipe abroad any grit or droppings that might be remaining.
The surface area that needs to be repaired must be free of any dust.
Applying Porcelain Repair Liquid…
You'll need to purchase loftier-temperature porcelain repair liquid.
This will ensure that the repair stays solid to temperatures up to 400 degrees or college.
You tin purchase a repair liquid that matches the color of the stovetop, so you lot will not need to do any additional painting.
You may need to mix different liquids to get the correct colour.
Warning: Practice not attempt to repair the porcelain that is inside the stove or oven.
The temperatures inside are far greater than the liquid is designed to handle, then information technology will melt away quickly.
Keep all repair efforts to the outside stovetop when using porcelain repair liquid.
Once the mixture is ready, milkshake it thoroughly in the bottle before applying. Simply apply the liquid to the damaged area until it fills it up.
For really deep dents and cracks, you may need to add additional coats afterwards it dries.
Wait five minutes after applying the outset glaze of the repair liquid, so information technology can dry out properly.
If you have any liquid spill over, wipe it away immediately before information technology has a hazard to dry.
If you lot have a damaged surface area around a curve, angle, or dip, you tin apply the repair liquid in combination with 600 or 1000-grit sandpaper.
But add together the repair liquid to the cleaned-out area, then sand subsequently each glaze dries.
Once you have applied the terminal coat, do not sand information technology and instead allow information technology sit then it tin dry with a smoothen surface.
How to Repaint and Refinish Your Stovetop Simply Similar New?
Now that you have made the repairs, you may desire to repaint your stove if it is looking sometime or worn.
Repainting is a fraction of the cost compared to replacing a stove, so if you want to salve money then repainting may be the all-time option.
Since everything starts with the pigment, you will need to purchase paint that can withstand the oestrus and humidity generated by the stove.
This means a high-temperature porcelain enamel paint that is designed for appliances.
This type of paint has an epoxy base which means it dries to a hard finish.
A type of finish that can withstand porcelain cleaners and agree up yr afterward yr.
Once you have purchased the paint in the colour that you desire, you are set to get started.
Step 1- Prep the Stove & Kitchen
Plow off the stove at the billow box then there is no chance of accidentally turning it on.
Next, slide out or remove the drawer under the oven compartment and pull the string from the wall outlet for extra safety.
If information technology is a gas stove, have a qualified professional close off the gas line.
Next, open up the windows and place a fan on the window sill, and pointing it outward.
This will pull any fumes from the kitchen to the exterior.
Remove all burners or grates depending on the type of stove you own. Pull all knobs off the stove every bit well.
Step two- Clean
Earlier you can paint, you must thoroughly clean the stove using a window cleaner.
Window cleaners are preferable since they are not oil-based.
An oil-based cleaner will get out backside a residue making it more hard for the pigment to stick.
To the items you removed from the stove, they can be cleaned separately using a window cleaner as well.
Step 3- Tape & Sand
Any areas of the stove that should non be painted should be covered.
This includes the burners which cannot be removed, chrome handles, oven drinking glass, and the similar.
Use masking tape, painter'south record, and newspaper to thoroughly embrace such areas.
Once covered, use medium-grit sandpaper over the surface that is going to be painted.
This will roughen the surface enough so the paint can easily stick.
Step four- Paint
At present yous are ready to employ the loftier heat porcelain enamel paint.
Milk shake the tin can for at least 60 seconds later you hear the pocket-size metal ball inside showtime to rattle.
This will thoroughly mix the paint and make it ready to apply.
Hold the tin can about ten inches away from the stove and spray on a lite coat of pigment.
Apply long, fifty-fifty strokes at the same distance to utilize the pigment.
You should not effort to cover the stove in i pass. Just continue it as even as possible.
Let the beginning coat dry which should take virtually an hour.
Then, apply a 2d glaze in the same manner that y'all did the first.
If you need to utilize a third coat, do so.
Just go along in mind that you need to let each coat dry out for an hour before yous pigment once again.
Step 5- Dry & Plug In
Once y'all are satisfied with the pigment job, permit it fully dry for near iii hours.
And then, remove the record and newspaper, replace the burners or grates, and reattach the knobs.
Next, plug the stove back into the wall outlet then flip the circuit breaker then that the outlet receives power.
For gas stoves, have a qualified professional turn on the gas line once again.
You lot can plough off the fan and close the window if yous desire.
And now you have a stove that tin exist operated again and in like-new condition.
Share the post "How to Gear up the Chipped Enamel Paint on Your Stovetop?"

Douglas Becker (aka Painter Doug) has over twenty years of experience every bit a painter in Adkins, Texas. At present, he resides in Florida with his family.
From painting multi-storeyed houses, condos, and apartments to large commercial buildings and small offices, he had served diverse customers in areas non only in Adkins but also in Southwest Florida, Sarasota, Naples, and many more. To know more about him check here.

How To Repair Stove Top Enamel,
Source: https://painterdoug.com/stove-top-enamel-repair/
Posted by: reeddonsagovive99.blogspot.com
0 Response to "How To Repair Stove Top Enamel"
Post a Comment